After purchasing your CDN follow a few steps to configure it in your website and make it work correctly.
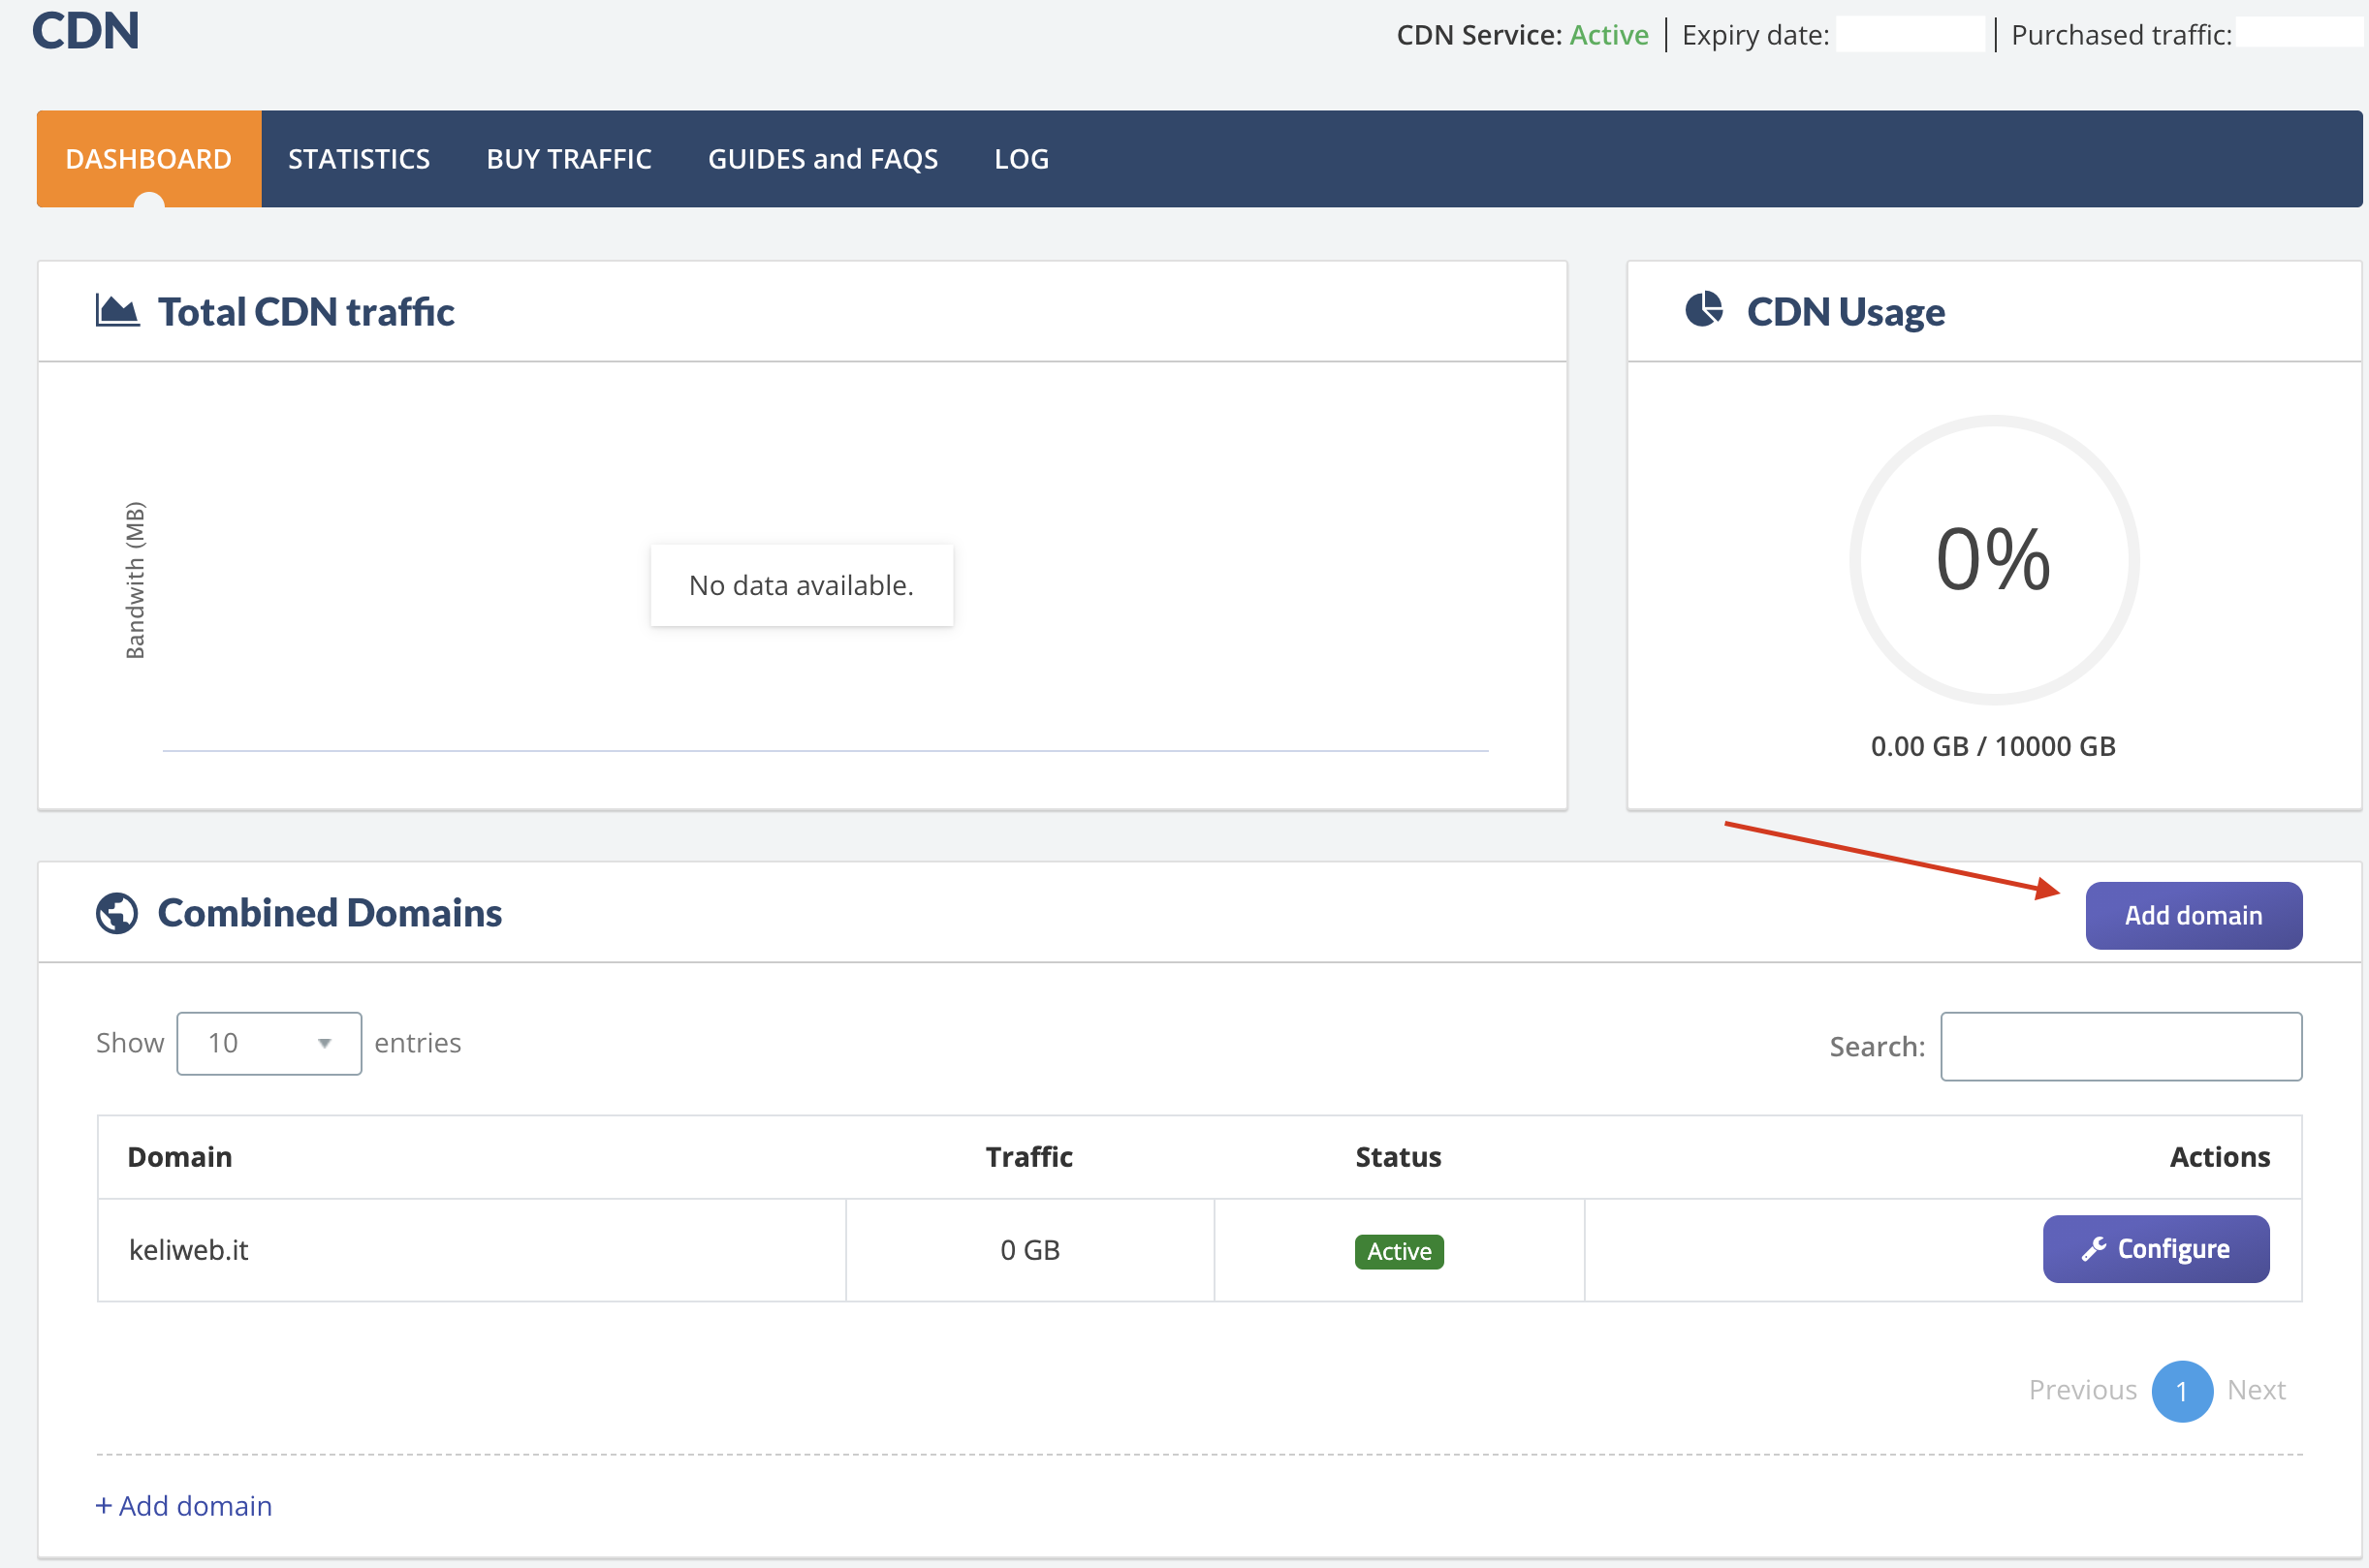
- Login to your customer area and click on CDN in the menu on the left
- Click on "Manage" next to the CDN service
- Click on "Add domain"

- Enter the domain name where to configure your CDN and click

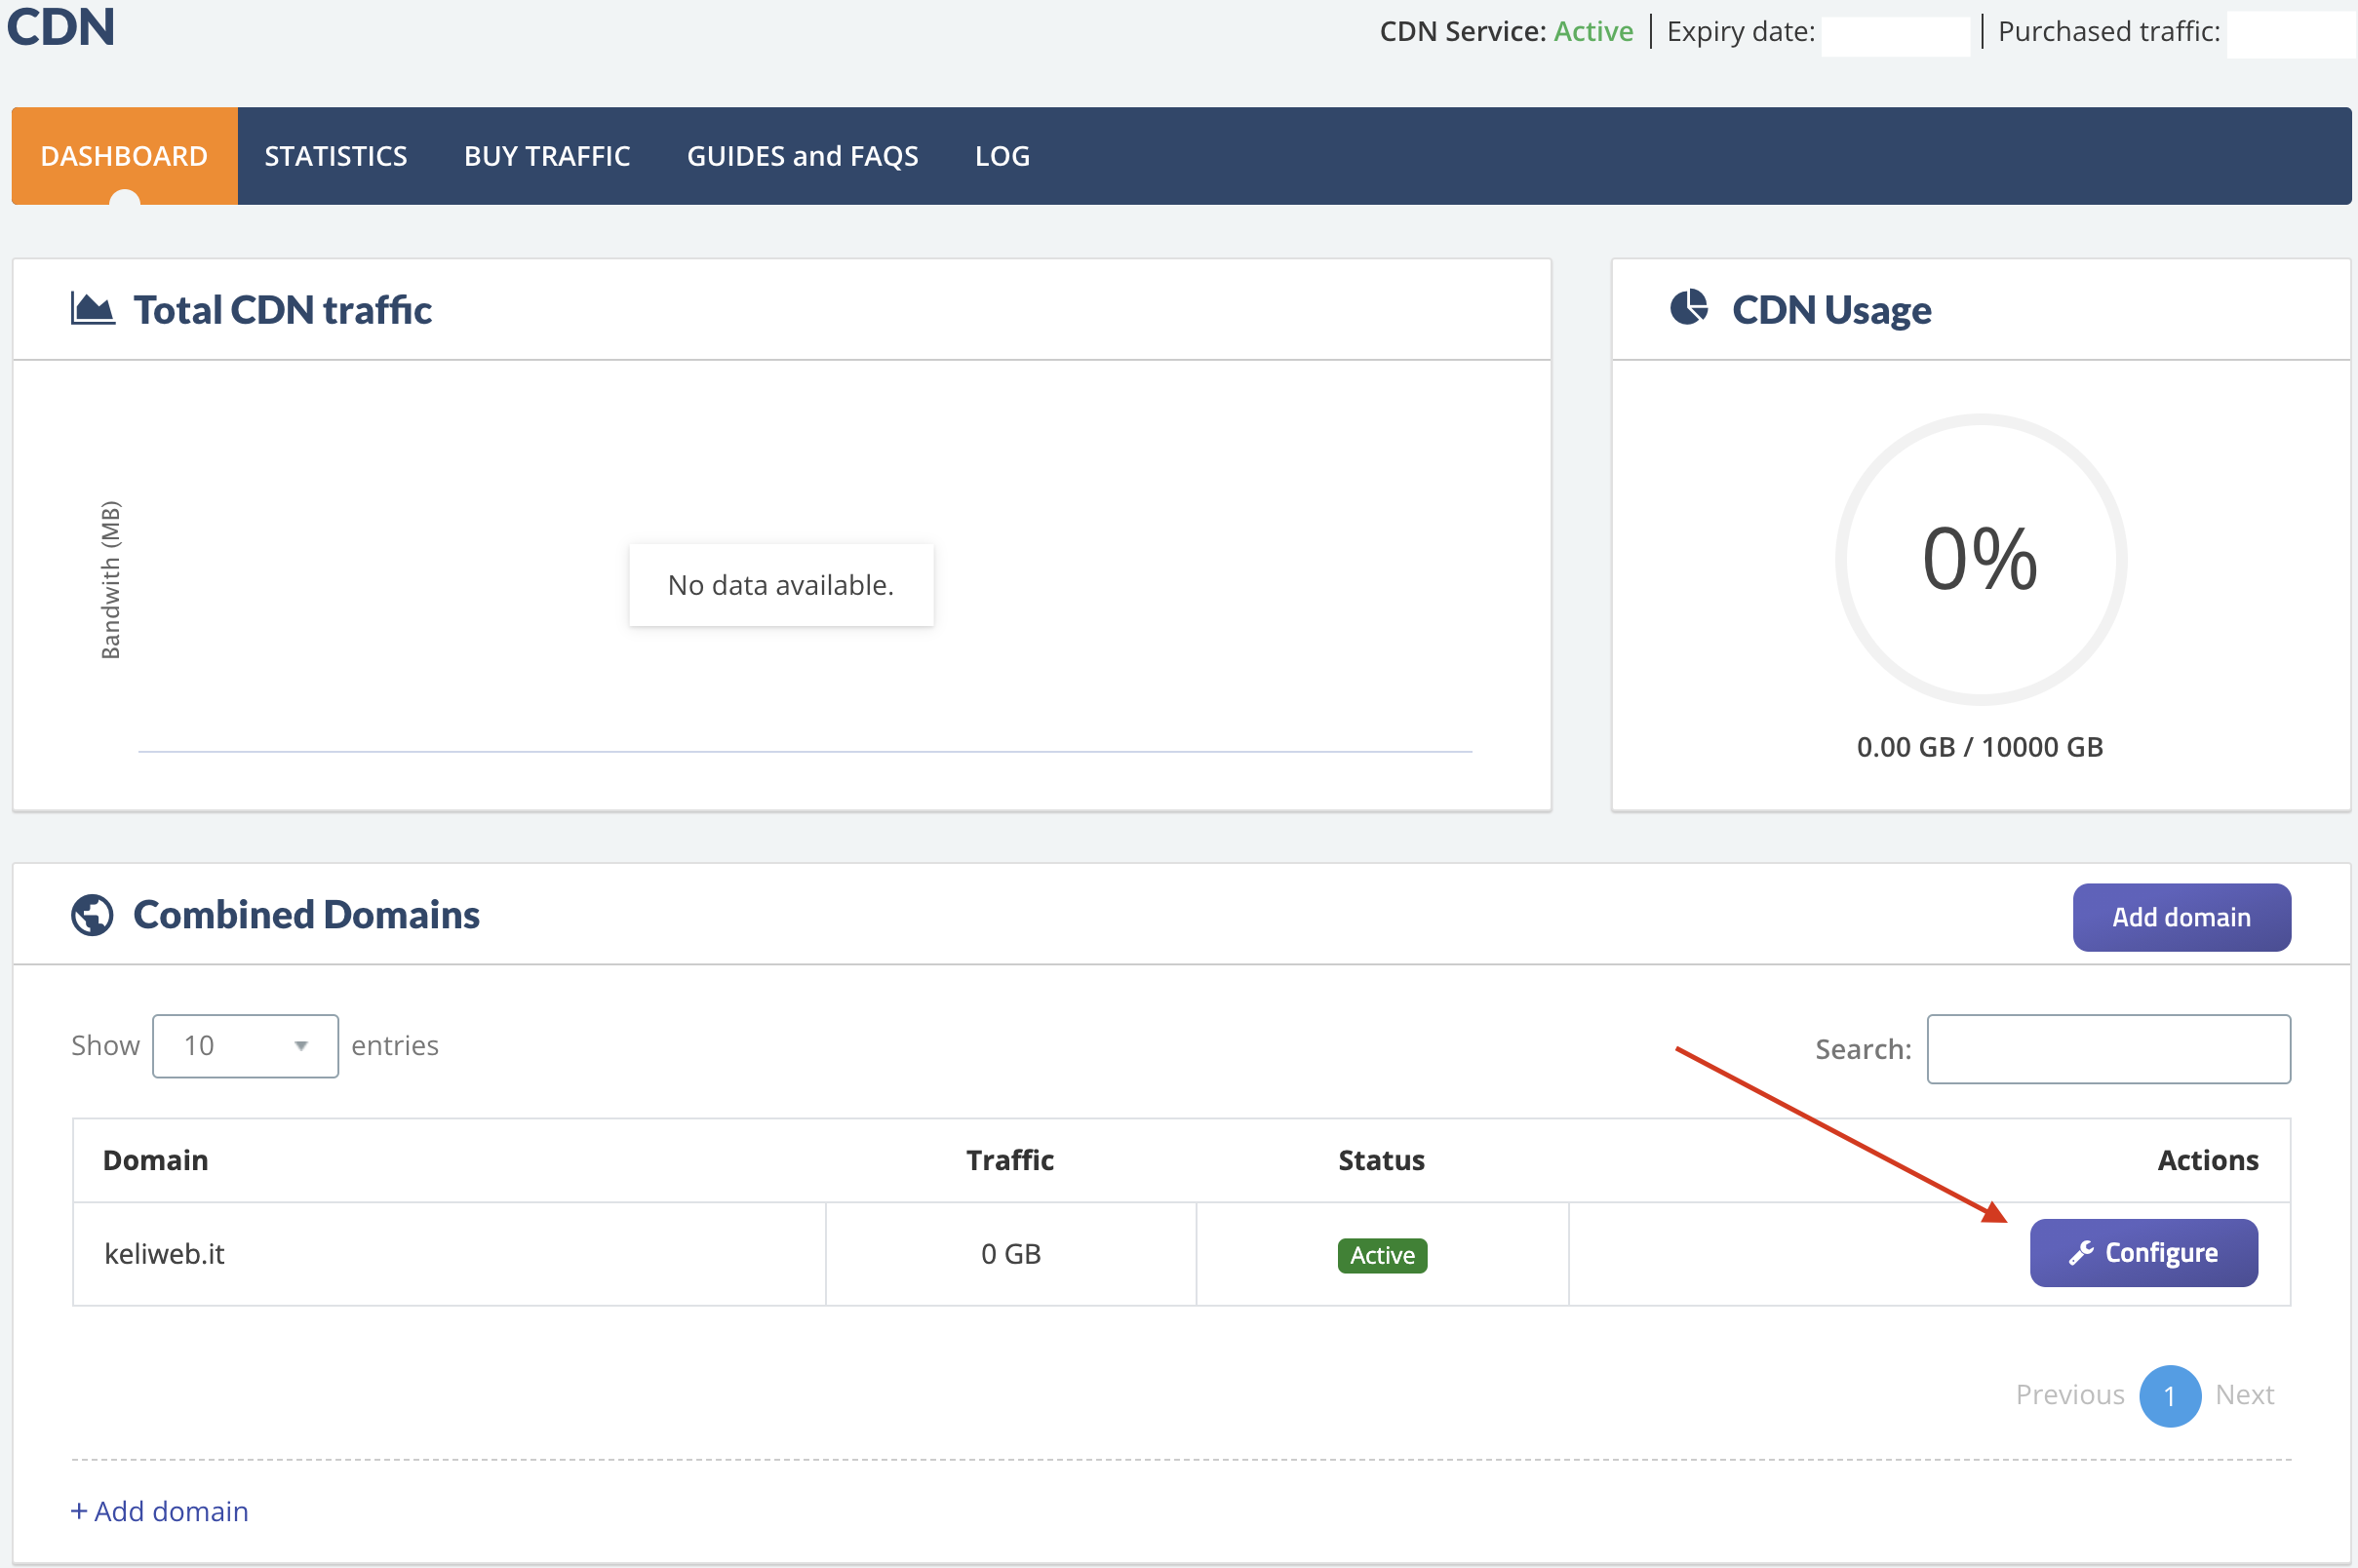
- As you add the domain, click "Configure"

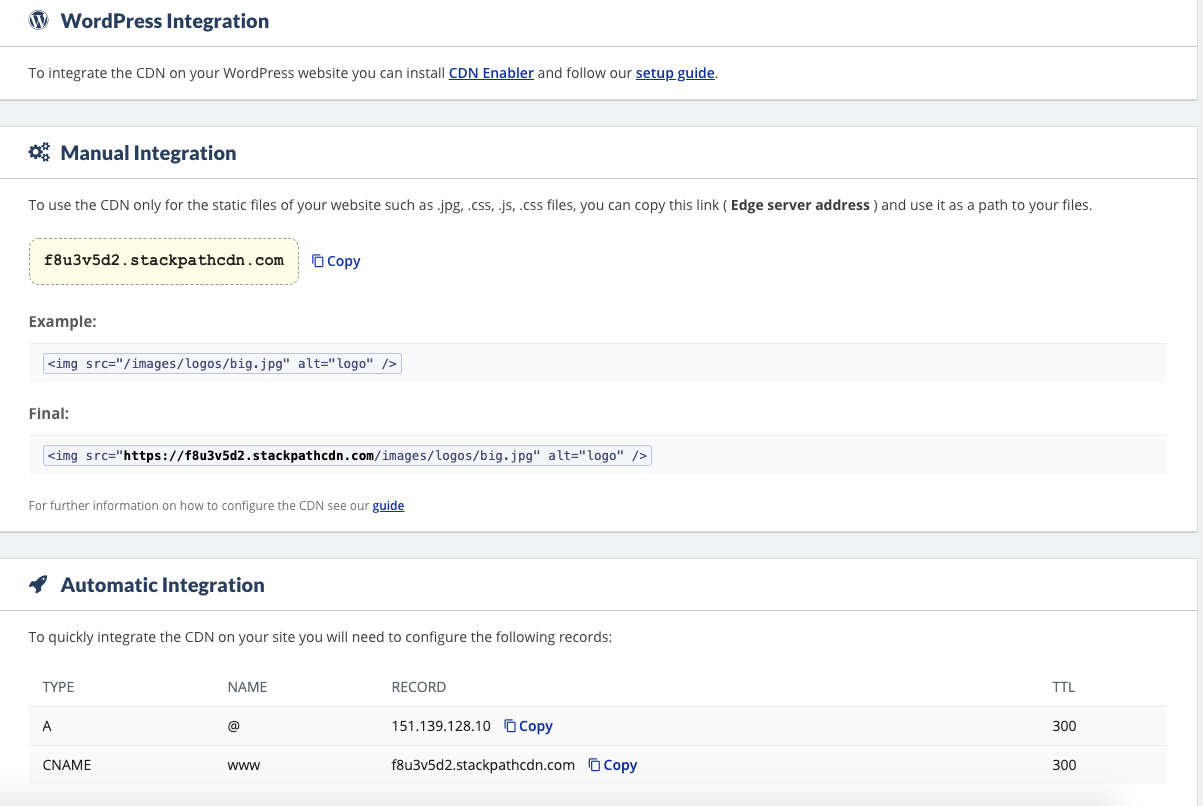
Below the CDN Domain box, there will be three boxes, WordPress Integration, Manual Integration and Automatic Integration
Choose Wordpress integration if you wish to configure the CDN on your WordPress website using one of the most popular WordPress plugin, CDN Enabler.
If you choose the Automatic integration you need to point the domain entirely to the CDN system. To do this, point the A record to the IP shown in the box (as in the figure). The WW record must be a CNAME record of the CDN name provided by the system. To complete the integration, access the DNS section of your cPanel control panel and proceed with the changes manually, copying the data provided in the Full integration block in your customer area. Once you have made the change on the DNS in cPanel, wait a few hours for the complete propagation of the new DNS.
Remember that by default the MX record on cPanel is set with the domain name. In case the domain is pointed externally (as in this case towards the CDN server) the incoming mail will stop working. To prevent this, change the MX record to "mail.domainname" (replacing domainname with your domain name) and change the mail record from CNAME to record A (deleting and recreating the record) making it point to the old IP assigned to the hosting package. This type of integration does not require any technical skills and is suitable for any type of website.
On the other hand, Manual integration can be achieved using the resource indicated in yellow ribbon in the Custom integration box (called server edge address) through one of the many plugins available for Wordpress or other CMS. To learn on the procedure, please consult our dedicated guide.


